Check out my new Instagram page and click that "Follow" button.
Thanks for the support!
http://instagram.com/jdeanmurray
Tuesday, May 27, 2014
Removable Windshield - Webisode
Another webisode on removing you glass windshield and replacing it with Marguard #10.
Marguard is plexi-like, speed glass style material that comes in a variety of thicknesses.
Check it out!!
Marguard is plexi-like, speed glass style material that comes in a variety of thicknesses.
Check it out!!
Custom Hood "Webisode"
I've been adding a couple new webisodes to my youtube channel. Plenty more to come.
If you get the chance SUBSCRIBE. I appreciate all the support.
https://www.youtube.com/user/JDeanMurray/
This one is on my custom hood, the paint scheme and the mounting system. Enjoy.
If you get the chance SUBSCRIBE. I appreciate all the support.
https://www.youtube.com/user/JDeanMurray/
This one is on my custom hood, the paint scheme and the mounting system. Enjoy.
Friday, January 31, 2014
Jeep Cherokee XJ 1984-2001: Advanced Performance Modifications
Okay folks I got to admit I'm a bit excited about this. A childhood friend and fellow XJ owner of mine (Eric Zappe) has finished his second book on Jeep Cherokees. It's available now for pre-order on Amazon.com. Click here for the link. Yours truly will have the distinguished honor to have his Cherokee in this book. Let me repeat that again. MY CHEROKEE WILL BE IN THIS BOOK! I told you I was excited. I'm not talking about 1 small picture, there's a 3-4 page spread.
Eric and I have been working on my specific section since early last year when he contacted me and asked if I could get him all the specific information about my Jeep. Following that I did a photo shoot in June 2013 with RickyB.Photography and sent those high resolution pics to Eric.
Well after the drafts were approved and the paperwork completed, the final product was sent to the printers and will be available for pre-order NOW!
For under $20 you can own a copy yourself. Please get one ASAP as the last book he published sold out all the beautiful high gloss copies quickly and only black and white remained.
My Cherokee has informed me that if anyone would like its autograph, he would be more than happy to run over your book with a tire.
XJ TALK.com
Finally I've posted on THE forum for Cherokees. http://www.xjtalk.com/

These guys have a great site. Stop by and see it for yourself. Click the hyperlink above.
And while you're at it stop by and subscribe to their Youtube channel here.
Weekly shows are LIVE Thursdays 10pm CST.
Rock Garden 1 "Bypass" Trail
Got a chance to ride a couple weeks back through our local trails. This one is called Rock Garden 1. Located in Mt. Olive, Alabama, this "bypass" started life as a trail around the hard stuff, but now has become hard itself. We had quite a few rigs blow their rear ends up on this trail ride, but the Cherokee did just fine.
Hope you enjoy. Thanks to Tommy Gilreath and his amazing driving, it allowed me to film all day.
Sunday, September 22, 2013
Mood Lights- Quick Interior Tour
Brief tour of the inside of my Cherokee. The mood lights just set the tone.
Rear Hatch- Fabrication
Let's get back to this custom hatch I've been stringing out for way too long. After making the necessary cuts to allow the tire to fit through the hatch, the Jeep was sent to the Offroad Connection in Fultondale, Al to have some sheet metal work done by master fabricator, Wayne Howse.

Here Wayne is tack welding the side arching pieces to the inside of the hatch. He formed them with 90* angles to allow better contact for welding. Welding sheet metal is hard enough as it is, so butt welding is just not an option. Well thought out.


The "eyelid" above the sheet metal arch covers the hole the rear windshield wiper used to be in. This will contain a LED light in it to shine on the license plate.


Here Wayne is tack welding the side arching pieces to the inside of the hatch. He formed them with 90* angles to allow better contact for welding. Welding sheet metal is hard enough as it is, so butt welding is just not an option. Well thought out.

After completing the sides he moved on to the face of the arch. Because he previously bent the side pieces, he had a decent platform for the face to lay on and tack to, well thought out.

Here it is all welded up laying against the new bumper from Dirtbound Offroad. The fit is flush with the bumper and the JCR Offroad Quarter panel/brake lights.


Not much rise was needed in the arch to accommodate the tire. Just about 1 & 1/16". When final paint is complete and the license plate goes back on the whole project will hardly be noticeable.

I removed the hatch handle and rendered it unless by gluing it together. I'll will remount this to use it as a handle, but not in the way it was originally intended. There is no lock catch on the inside anymore, so I will need to find another way to keep the hatch firmly closed.


I haven't decided how I will fasten the handle to the door. One way or the other it needs to stay put.

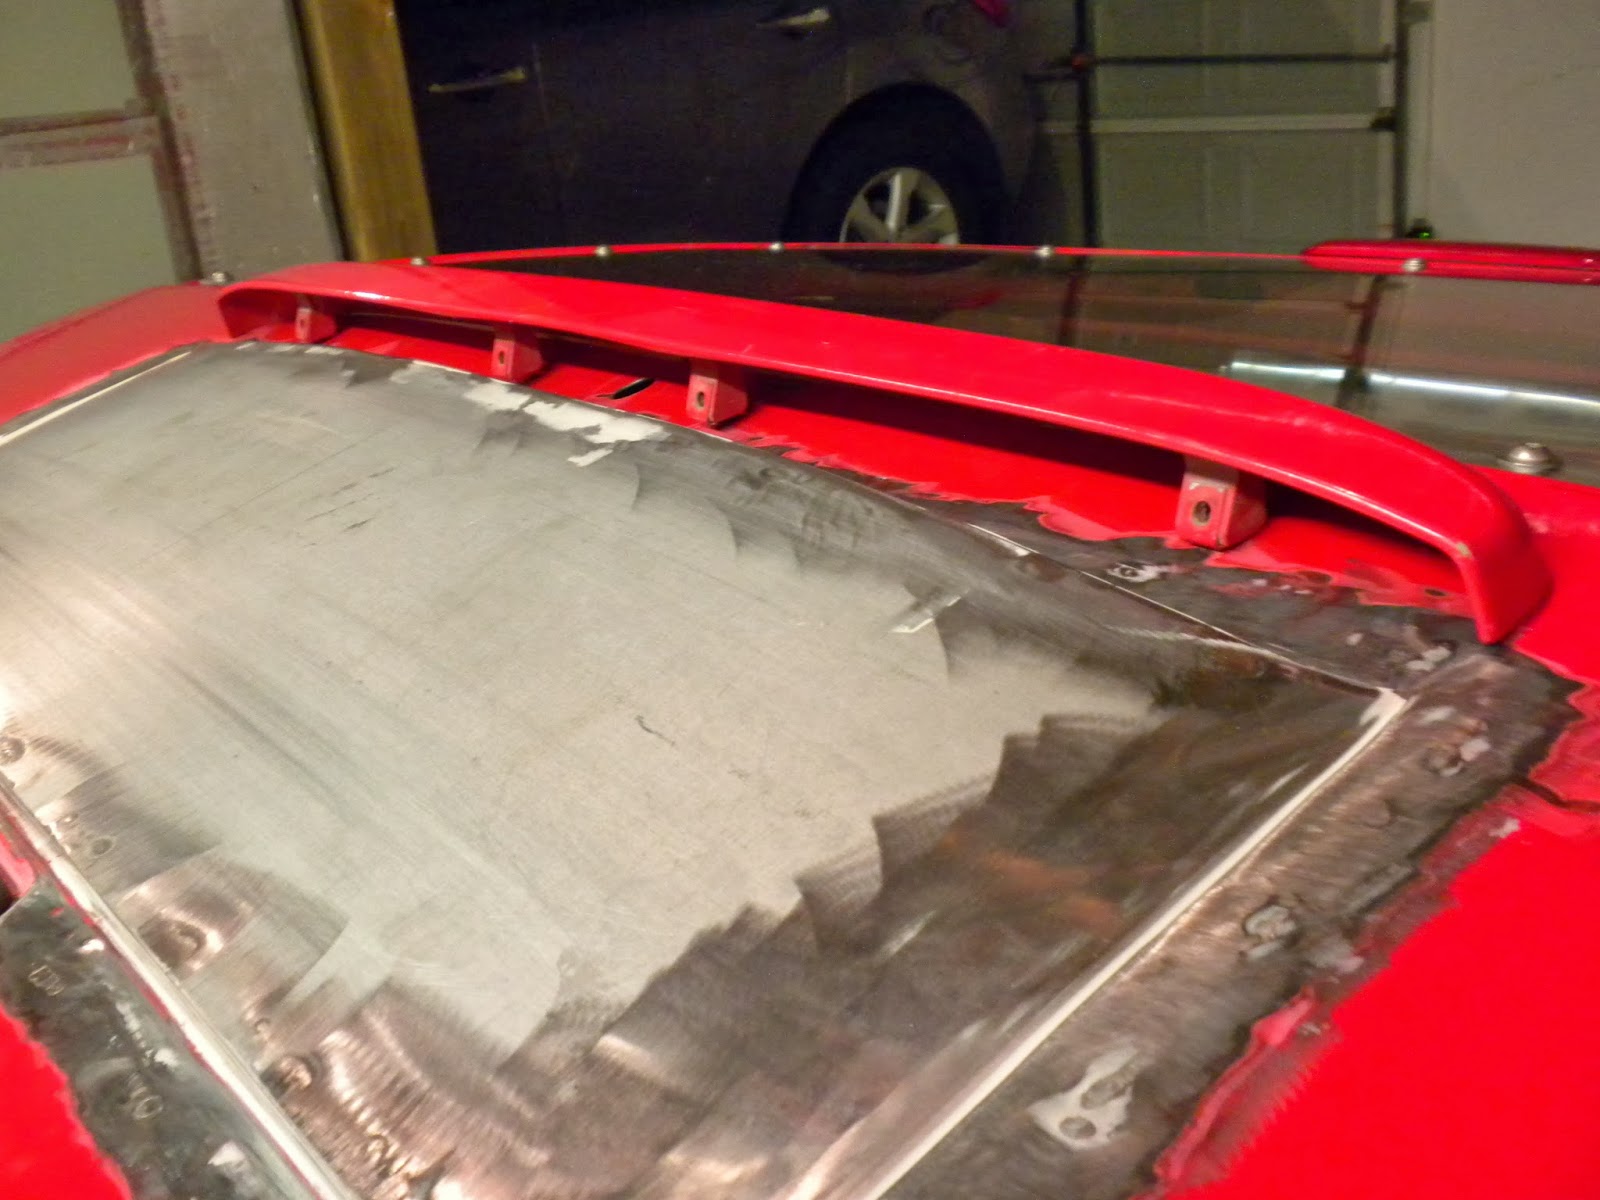
Here is a picture of the 1/4" Marguard #10 plexiglass/speedglass. I bought this at a local plastic distributor and trimmed it down to size through the use of a template I designed.

I'm using 1/4" cap head/hex head stainless steel bolts to mount the plexiglass. There are 16 in total.

The hatch will be secured with 2 hood pins. 1 on each side. This process will be done soon and all progress will be documented in the future.

Here is a picture showing the rise in the arch of the metal work. 1 & 1/16".

The length of the sheet metal work at approx. 28".

The height of the sheet metal work at approx. 8 & 1/4".

The project as it sits now. I applied some Bondo to smooth out the edges. I will need to use some fiberglass to blend it all together smoothly. I will document that process in the future.

The "eyelid" above the sheet metal arch covers the hole the rear windshield wiper used to be in. This will contain a LED light in it to shine on the license plate.

Sunday, July 7, 2013
Ricky B. Photo Shoot
I had this photo shoot done a couple a weeks ago. Location: Grayrock Mt. Morris, Al. Photographer: Ricky B. of http://www.rickybphotography.com/ I polished and painted my ride for what seemed like 50 hours within the past 2-3 days in preparation for this event.
It was hot and humid. After the still shots we headed into the thick cover of the woods. The humidity probably increased by 40%. Ricky walked in front of me a lot of the way, backwards, constantly shooting.
This is a sample of some of the shots. Visit this link to see some more.


It was hot and humid. After the still shots we headed into the thick cover of the woods. The humidity probably increased by 40%. Ricky walked in front of me a lot of the way, backwards, constantly shooting.
This is a sample of some of the shots. Visit this link to see some more.


Monday, March 25, 2013
Rear Hatch Modification- Tear Down and Templates
Recently I re-acquired my rear hatch from a friend that I gave it to (thinking I'd never want to use it again). HA. It is now my intention to remount the hatch and continue the body lines the engineers of the Cherokee worked so hard to achieve. In addition, I think it looks more complete by not allowing the brake lights to just "hang out" there in space. So off I went in disassembling the hatch and its components.


Items needing to be removed included: Trim, glass, wiper and wiper motor, handle and linkage. The worst of them all was the glass. I took my time so that I would slice myself open, but eventually broke the glass and cut myself anyway.


Then I had to re-acquire some hinges for the hatch, so off to the local Pull-a-Part I went.

The I fitted the hatch without the spare tire in so I could see if I had any issues. Everything aligned well and it was off to the next step. Installing the spare tire and marking the hatch for cutting.


With the spare tire in it is plain to see the tire sticks out [into] the hatch.


I grabbed the necessary tools to begin cutting.

I started hacking away at the inside of the hatch first, opening it up until it accepted the tire. The hatch closed a little more..


Then I started cutting the outside panel. I did this in a rectangular shape large enough to clear the tire as the hinged hatch swings down over it.


Then I made a template for the 1/4" Marguard #10 I'll be purchasing this week to replace the heavy, unsafe rear windshield.


Then I started designing the template for the tire hole/license plate. Obviously it need to be bowed outward to allow room for the tire. This is what I came up with. I'll transfer this to .22ga sheet metal and weld everything in place. This entire hatch is getting re-painted (inside and out) so it doesn't bother me if it gets grinded on...for now.


Then I added the rear handle, which is now rendered non-operational, and the factory eyebrow above the license plate template that will house a LED for the license plate.


My goal is to blend the sheet metal work in, paint the hatch black, get the third brake light working and the LED in the eyebrow. Since the hatch doesn't have a operational handle or inside latch it will remain securely closed with Autofab hood pins, identical to the versions used on my hood. I'll use two hood pins, one at each lower corner of the hatch. I still need to get some hood struts to keep the hatch up, but they will be included in the final plan as well.
Here is a small video describing the process:
Subscribe to:
Posts (Atom)