Welcome
Thanks for visting! The table of contents are on the right. Archives for this blog are located at the bottom of the page.
Thursday, May 5, 2011
Gibson Headers-Sandblasted
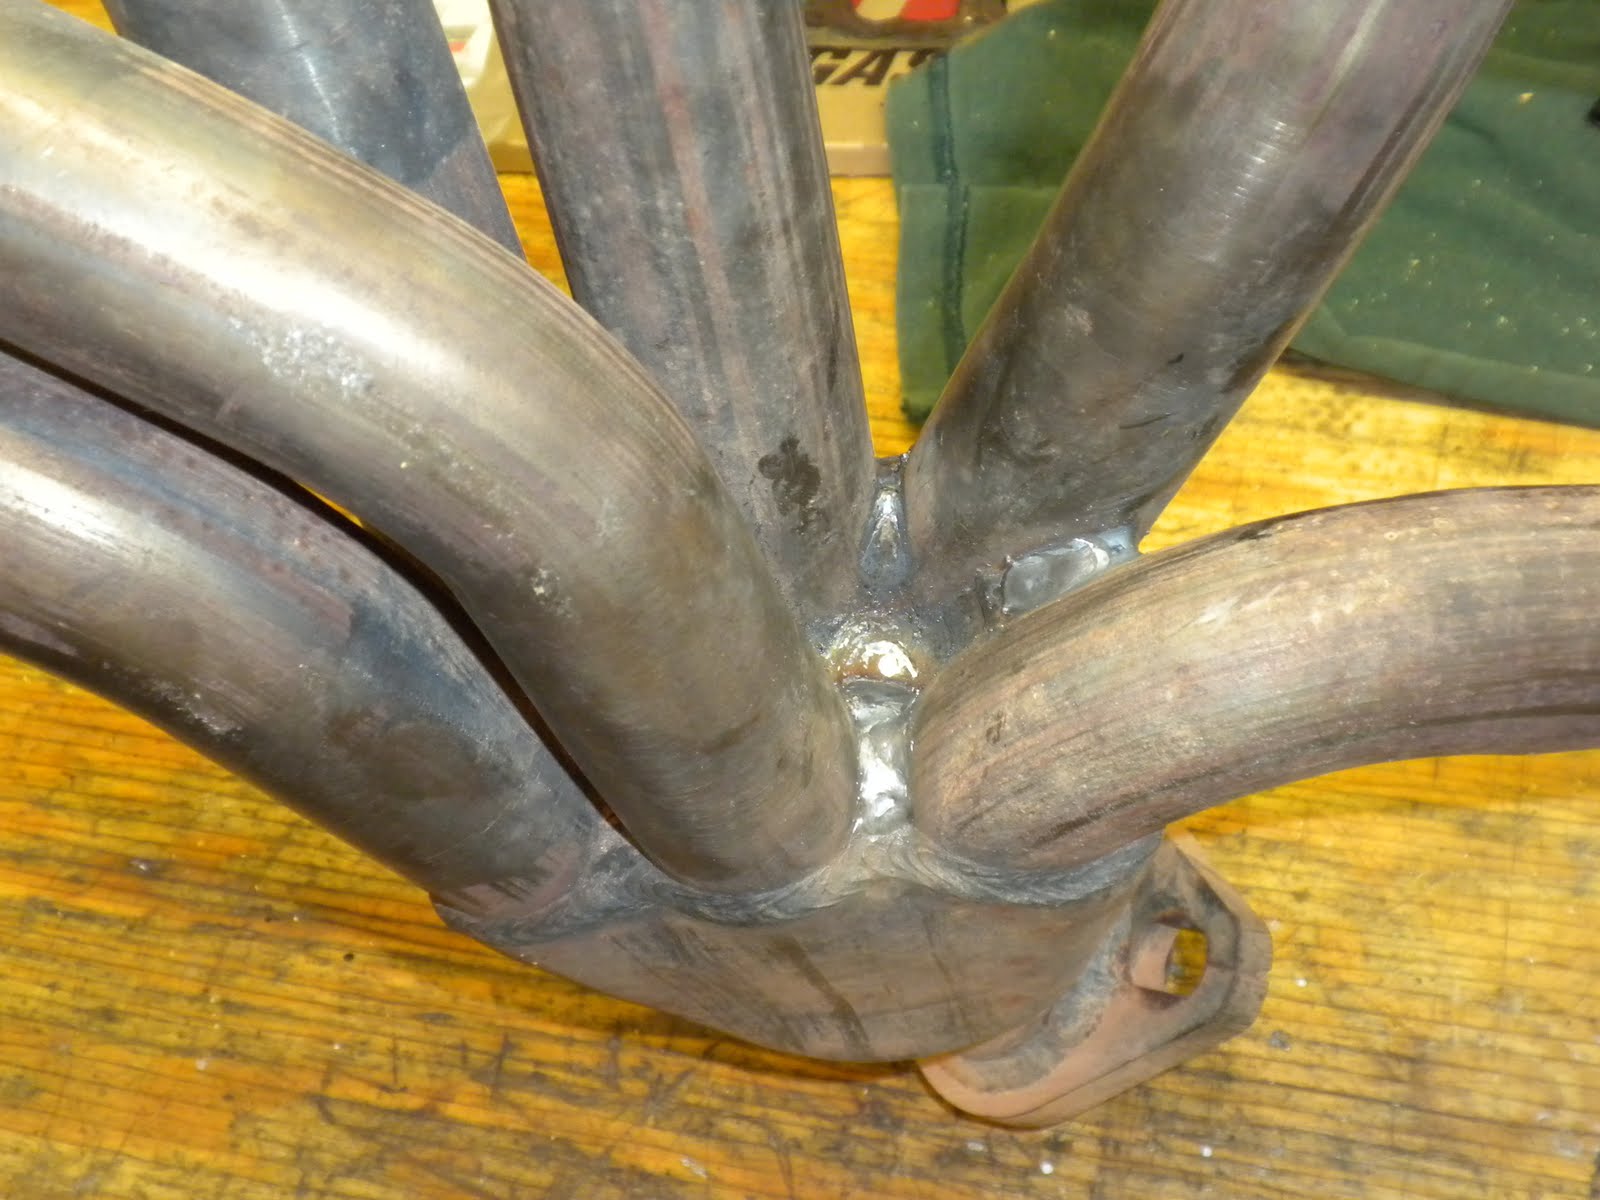
I ran these through the blaster at ORC today. Another step to further inspect the welds before I re-install it. Everything looks good. They're stainless steel but do not have a ceramic coating or nickle plating so it's safe to sandblast. I don't think clear coat would hold up to the temperature so it's safe to say they won't stay clean long. None the less they're clean, repaired and ready to install.


Tuesday, May 3, 2011
Intake-Sandblasting & Modification
After a quarter-million miles it was time to remove the intake and clean it up. I wanted to sandblast the outside and remove the carbon and fuel deposits from the inside. So off it came.

Fuel deposits in one of the runners.

Freshly sandblasted. Now I wanted to remove the hose attachments that I wasn't using. Basically all of them that you see. I'm only using the threaded bung on the left. I thought I would just fill them with JB Weld but that didn't work. So I decided to drop it off at Pinson Truck and have Blake drill out the metal inserts and weld the holes shut. Keep in mind this is cast aluminum.

The end of the runner where the fuel is injected was pretty dirty. Not anymore.

Welded up nicely. Hard to tell they were there. I sprayed the entire intake with clear coat.

Where the top two inserts were.

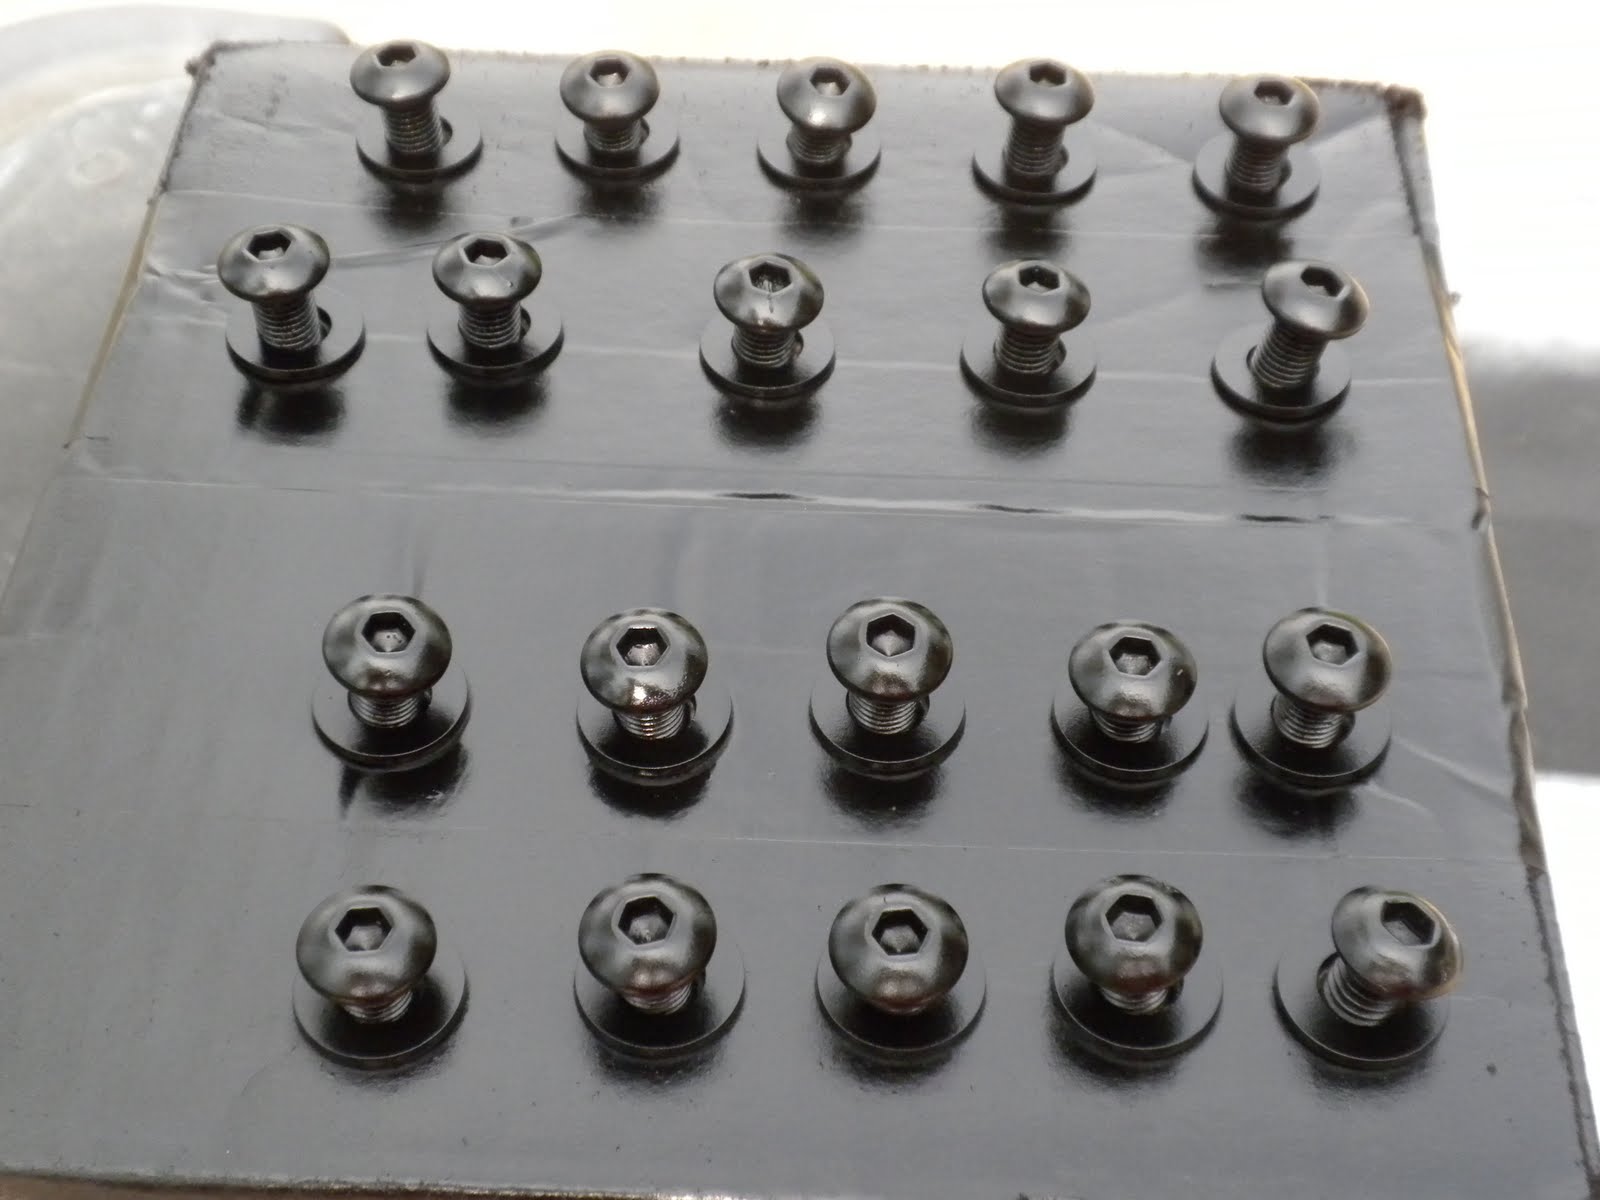
Clean hardware. Original washers, new bolts.

Fuel rail blasted and painted.

Fuel rail hardware. Too clean!


I'm pretty happy with the look of this. I'm sure the results will be noticeable. One thing to remember is 19lb. injectors will be installed. Thank God for sandblasters.
Fuel deposits in one of the runners.
Freshly sandblasted. Now I wanted to remove the hose attachments that I wasn't using. Basically all of them that you see. I'm only using the threaded bung on the left. I thought I would just fill them with JB Weld but that didn't work. So I decided to drop it off at Pinson Truck and have Blake drill out the metal inserts and weld the holes shut. Keep in mind this is cast aluminum.
The end of the runner where the fuel is injected was pretty dirty. Not anymore.
Welded up nicely. Hard to tell they were there. I sprayed the entire intake with clear coat.

Where the top two inserts were.

Clean hardware. Original washers, new bolts.
Fuel rail blasted and painted.
Fuel rail hardware. Too clean!
I'm pretty happy with the look of this. I'm sure the results will be noticeable. One thing to remember is 19lb. injectors will be installed. Thank God for sandblasters.
Gibson Headers-Repair
Since I was removing the intake I decided to inspect the headers to see if I had developed a crack or two. After removing as much dirt as I could with a pressure washer I could see a small tear in one of the tubes and a crack in the pool at the collector.


So I took it to Pinson Truck and had Blake(their master welder)stitch it up. It's stainless steel so it needed a little more attention than I could give it. Needless to say I'm extremely happy with his work.

So I took it to Pinson Truck and had Blake(their master welder)stitch it up. It's stainless steel so it needed a little more attention than I could give it. Needless to say I'm extremely happy with his work.
Brown Dog Motor Mounts-Install
Time to install these. I've heard quite a bit about these motor mounts. As far as I'm concerned a motor mount is a motor mount, and that's that. My OEM mounts lasted over 200,00 miles and only failed recently because my headers got so hot, the driver's side partially melted, and of course they were also wallowed out a bit.
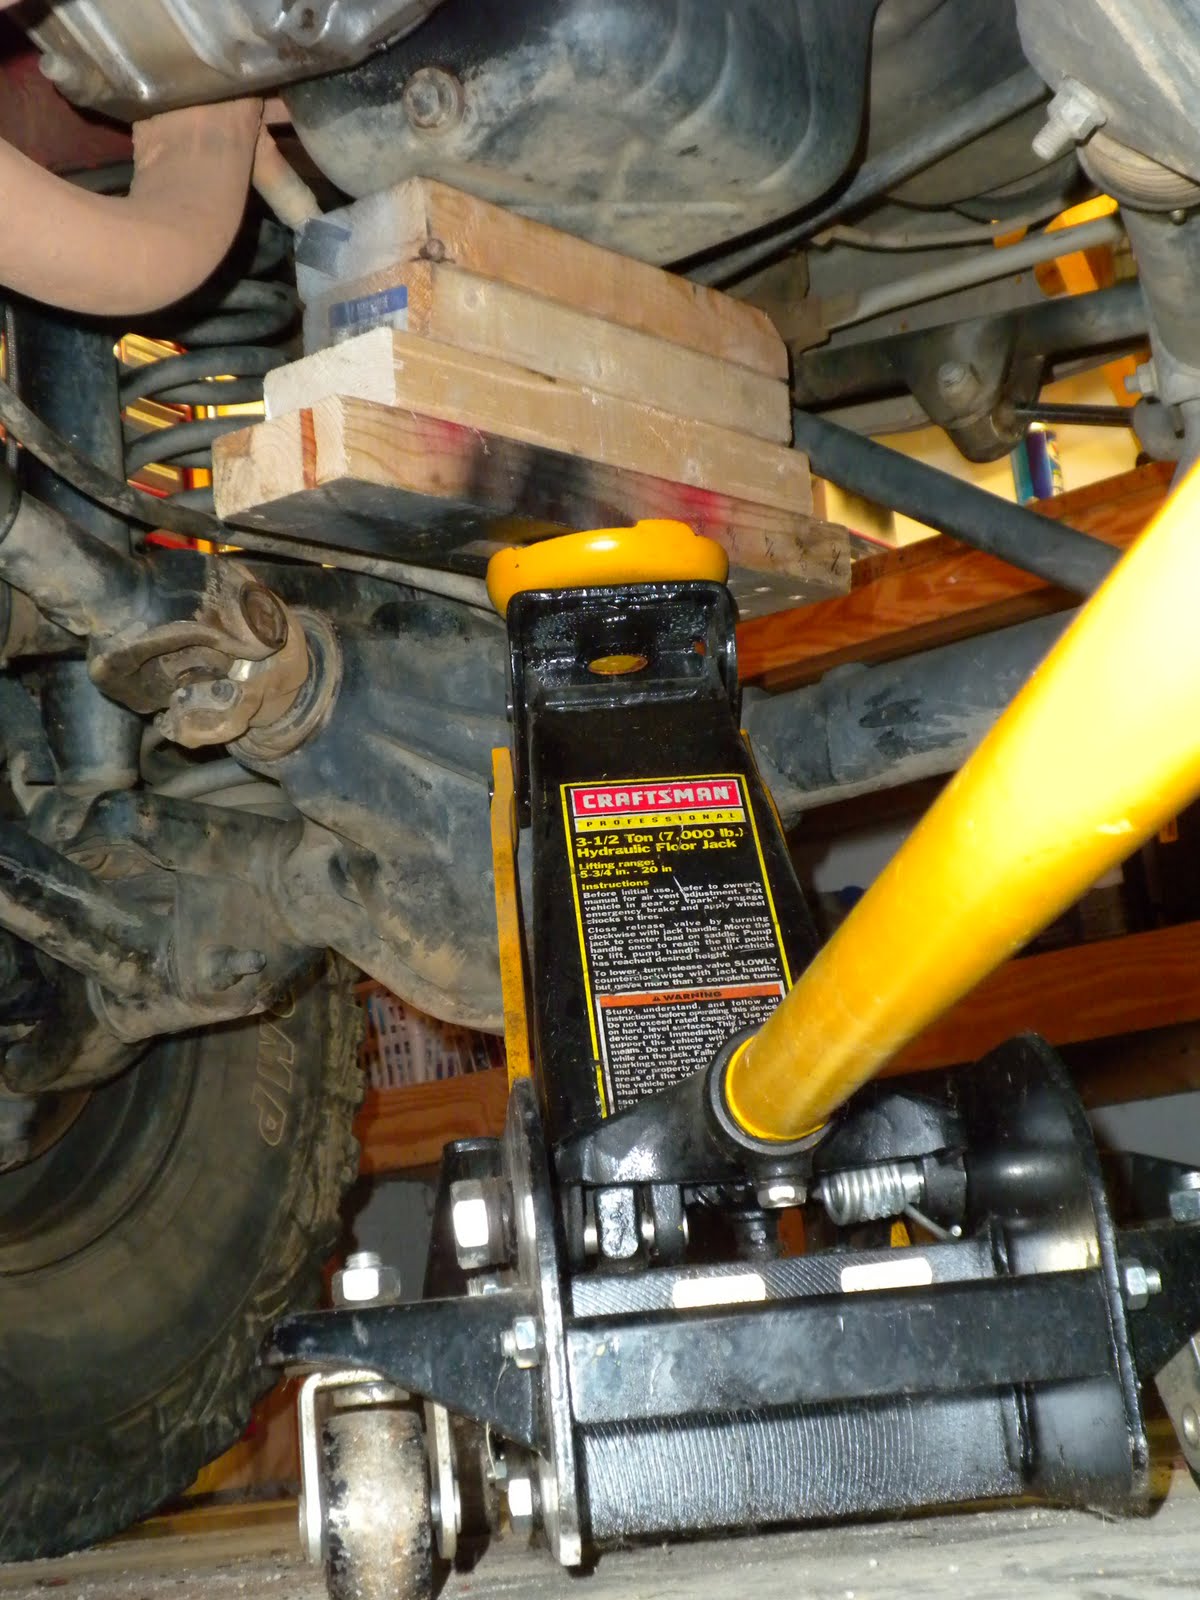
Taking the weight off the mounts with a floor jack.

Loosen the driver's side hardware.

Remove the OEM mount.

Here you can see the rubber melted from my headers glowing red.

Driver's side mount.

Switched from OEM rubber to poly. It should transfer quite a bit of vibration through the body, but I'm up for it.

It took quite a bit of work to get these to line up, more than I would have liked.

Passenger side mount.

Pros:
-Look beefy. Strong welds, good design.
Cons:
-They're yellow.
Seriously though...I haven't ran them yet and probably won't for the next month. But like I said earlier, a mount is a mount.
Taking the weight off the mounts with a floor jack.
Loosen the driver's side hardware.
Remove the OEM mount.
Here you can see the rubber melted from my headers glowing red.
Driver's side mount.
Switched from OEM rubber to poly. It should transfer quite a bit of vibration through the body, but I'm up for it.
It took quite a bit of work to get these to line up, more than I would have liked.
Passenger side mount.
Pros:
-Look beefy. Strong welds, good design.
Cons:
-They're yellow.
Seriously though...I haven't ran them yet and probably won't for the next month. But like I said earlier, a mount is a mount.
Thursday, April 7, 2011
Tomken Front Steel Tube Fenders
Tomken front tube fenders. I originally saw these on NAXJA. The comments were positive but no one had them installed. My next call was to Vicki at Tomken. Very nice lady and she was very helpful. She informed me the fab/delivery time would be about 2-3 weeks. No problem, I have a ton of stuff to do to my Jeep while I wait. I called about halfway through the process to ask a key question I forgot to initially ask. "Did I already trim too much off my fender for these to mount?" To be completely honest, it is impossible to answer that question on the phone. So I ended that conversation with a little doubt in my mind. None the less the fenders arrived and I was very pleased with their appearance.
Arrived in bubble wrap via UPS. 46lbs (According to UPS)

These are the inner fender supports. Cut the tube down to size, weld it to the disc, weld both inside the fender. It's threaded already, so you line it up with a specific mounting bolt for maximum support. Great idea!

Fantastic welds along the entire fender. I may come along and weld/grind where the sheet metal and tubing meet. Try to blend it in better. But it looks fine for now. Actually it looks great, I'm just prone to modify.

I had to pull the inner fenders out. Not that plastic, that's been gone for years. These were inner fenders I made to keep the elements out after removing the factory plastic. None the less, they had to be removed. Now I'll have to come up with something new to fill that gap.

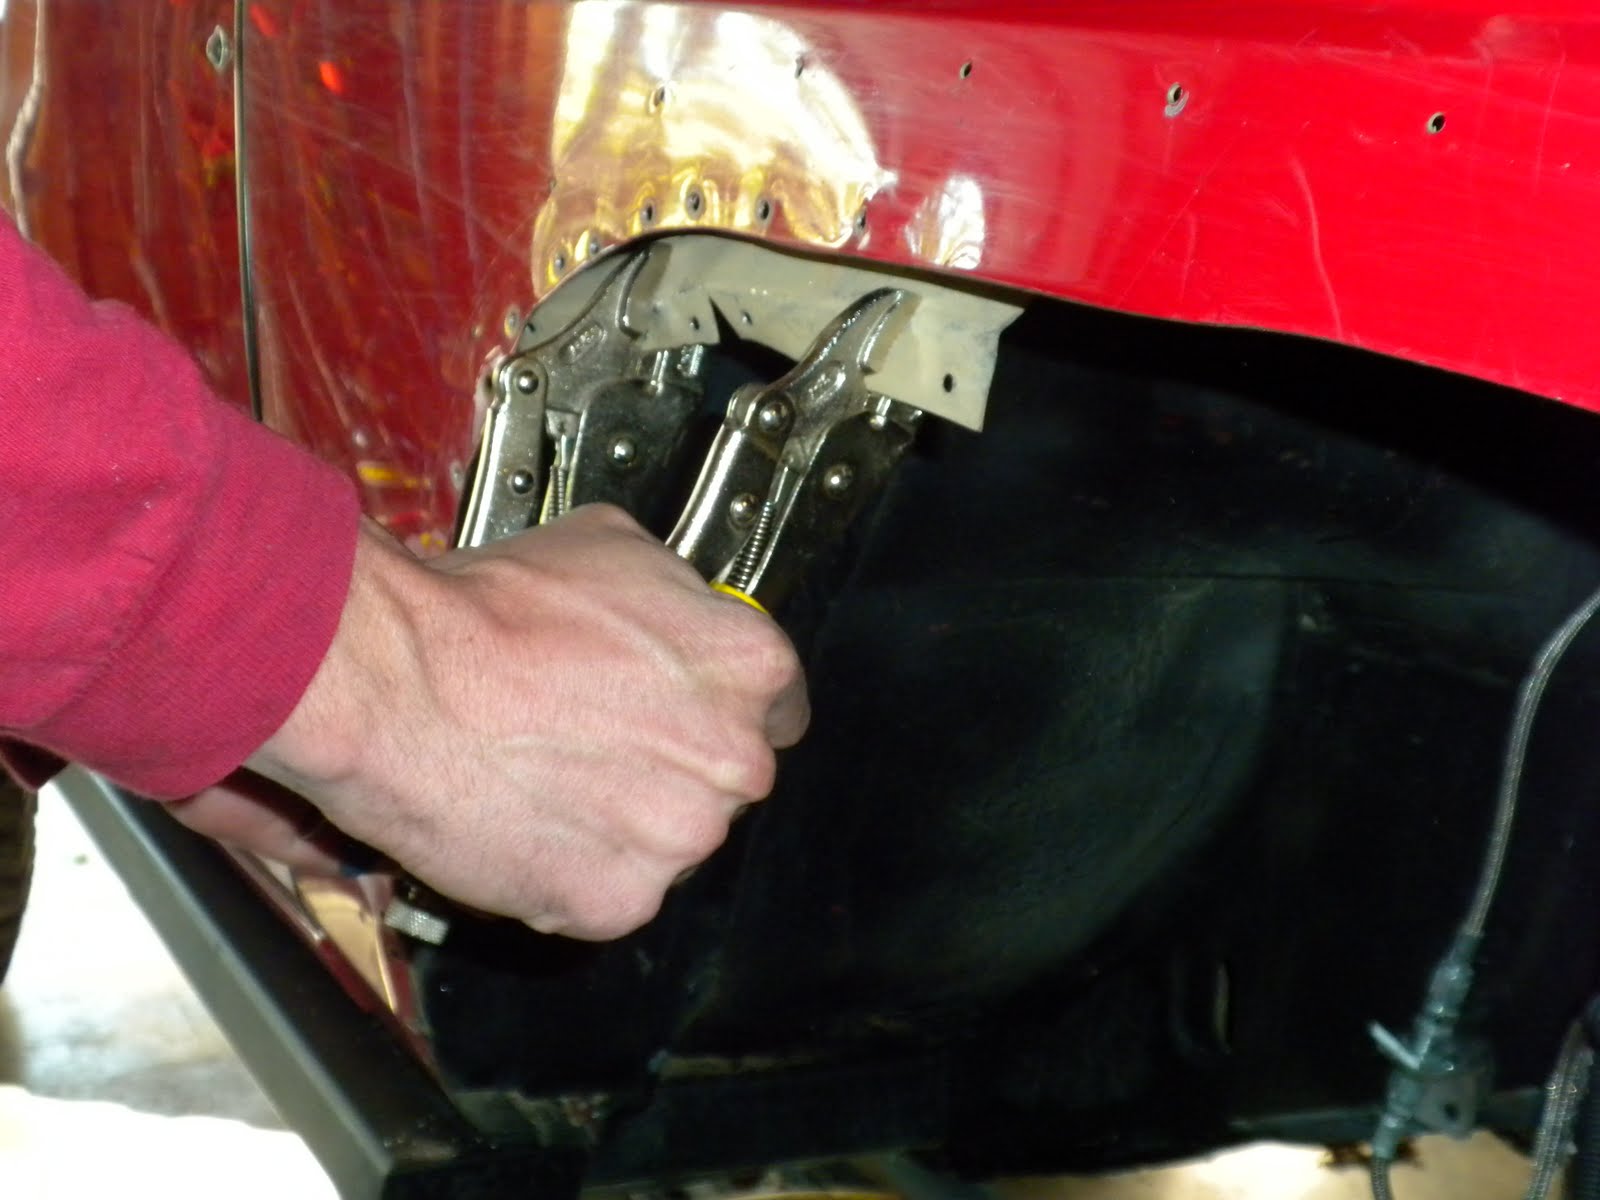
Clamp them on and get ready to drill. The actual install on these fenders took about an hour. 30 minutes per side, and that's because we were taking our time. Easy to reach all nuts/bolts.

I was going to use counter-sunk bolts but the material isn't thick enough to support those bolts so I went to a button head. They do include hardware, I just didn't use it.


Absolutely one of the best mods I've done to the outside of my Cherokee. I'm extremely satisfied with the service, quality and look of this product. If I would have known these were going to look this good, I would have ordered them a lot earlier.
Pros:
-9 out of 10 for the way this thing fits. Rolled so that it fits the contour of your fender.
-Looks. Looks. Looks. Everybody looks at it. I couldn't have got anymore compliments over this past weekend ride at Grayrock. I can't stop going out in the garage and looking at it.
-Great customer service. Pleasant people on the phone answer all your questions.
-Welds look amazing.
Cons:
-A couple small chips in the power coating upon delivery. Nothing major. (I was originally going to paint these flat black, but the power coating looks so good.)
-That's it!!! I'm very satisfied!!
General link to website- http://www.tomken.com
Link to Tube Fenders- http://www.tomken.com/detail.php?id=387
Arrived in bubble wrap via UPS. 46lbs (According to UPS)
These are the inner fender supports. Cut the tube down to size, weld it to the disc, weld both inside the fender. It's threaded already, so you line it up with a specific mounting bolt for maximum support. Great idea!
Fantastic welds along the entire fender. I may come along and weld/grind where the sheet metal and tubing meet. Try to blend it in better. But it looks fine for now. Actually it looks great, I'm just prone to modify.
I had to pull the inner fenders out. Not that plastic, that's been gone for years. These were inner fenders I made to keep the elements out after removing the factory plastic. None the less, they had to be removed. Now I'll have to come up with something new to fill that gap.
Clamp them on and get ready to drill. The actual install on these fenders took about an hour. 30 minutes per side, and that's because we were taking our time. Easy to reach all nuts/bolts.
I was going to use counter-sunk bolts but the material isn't thick enough to support those bolts so I went to a button head. They do include hardware, I just didn't use it.
Absolutely one of the best mods I've done to the outside of my Cherokee. I'm extremely satisfied with the service, quality and look of this product. If I would have known these were going to look this good, I would have ordered them a lot earlier.
Pros:
-9 out of 10 for the way this thing fits. Rolled so that it fits the contour of your fender.
-Looks. Looks. Looks. Everybody looks at it. I couldn't have got anymore compliments over this past weekend ride at Grayrock. I can't stop going out in the garage and looking at it.
-Great customer service. Pleasant people on the phone answer all your questions.
-Welds look amazing.
Cons:
-A couple small chips in the power coating upon delivery. Nothing major. (I was originally going to paint these flat black, but the power coating looks so good.)
-That's it!!! I'm very satisfied!!
General link to website- http://www.tomken.com
Link to Tube Fenders- http://www.tomken.com/detail.php?id=387
Monday, April 4, 2011
Master Disconnect- Refab and Finishing
So it was time to refab this. The old design was never going to work. I would never been able to grind down the welds enough to make it as smooth as I wanted it. So Keith at ORC came up with the idea of flaring it 90 degrees and off we went.
Old way. The 3" tube was butt welded to the sheet metal. It caused warpage and I would never been able to grind the welds down enough to be perfect.

New idea. I drilled a 3" hole in the sheet metal and simply slid the flared 3" tube in the hole. Then Josh spot welded it from behind as I stood behind him telling him to be careful. As you can tell by the picture, he did a perfect job! I applied body putty to smooth things out.

Final finish view from the front. The sticker is on yet, I may replace it with something corny like "Sleep,Race". Anyway, I'm pretty happy with it.

A view from the inside. Obviously I haven't wired it up yet. This shows the limited welds used to prevent metal distortion.
Old way. The 3" tube was butt welded to the sheet metal. It caused warpage and I would never been able to grind the welds down enough to be perfect.
New idea. I drilled a 3" hole in the sheet metal and simply slid the flared 3" tube in the hole. Then Josh spot welded it from behind as I stood behind him telling him to be careful. As you can tell by the picture, he did a perfect job! I applied body putty to smooth things out.
Final finish view from the front. The sticker is on yet, I may replace it with something corny like "Sleep,Race". Anyway, I'm pretty happy with it.
A view from the inside. Obviously I haven't wired it up yet. This shows the limited welds used to prevent metal distortion.
Soft Door-Upholstry Complete
Well this whole door thing is finally about wrapped up. I can't even begin to tell you how excited I am to finally use these things. Whether it be cruising through a mud hole and not checking the brakes or running down the road without getting cold. These are made from the kind of material used on a convertable BMW, quality material. They sport a #10 zipper around the window. In addition, they're removable. Velcro was used around the edges, so it can be removed within a minute.


Vinyl Install
In preparation of my front fender guards (being delivered this week) I am applying black vinyl on my door skins. This will continue the black "look" from back to front. The front fenders will also be flat black. So off to Stripe King I went. I picked up 12ft. of flat black and began to install it.
A little water helps position the vinyl. Too much and you'll have a hard time getting it out with the squeegee. Then you can wrinkle the vinyl by pushing too hard. Like I did on the front panel.


Here I used to scrap vinyl to put a border around the window. It provides a better look and covers any welds or holes in the frame.
A little water helps position the vinyl. Too much and you'll have a hard time getting it out with the squeegee. Then you can wrinkle the vinyl by pushing too hard. Like I did on the front panel.
Here I used to scrap vinyl to put a border around the window. It provides a better look and covers any welds or holes in the frame.
Friday, March 4, 2011
Fuel Injectors
Time to install these 19lb. Mustang Injectors. Pump up the volume. JJ, my incredible friend from Ragland, hooked my lazy, cheap ass up with these beauties. So I took the initiative to paint them and pigtail the harness in preparation for the install. From what I've seen this is a direct swap if you have older than a 1998. But the new intake changed the clip on the harness and now the new injector won't plug in. So I have to solder the new clips on the old harness.

Tuesday, March 1, 2011
Brown Dog Motor Mounts
Subscribe to:
Posts (Atom)