Monday, August 20, 2012

Overhead Console- (Rough) Installation

Just a rough fitment here. I drilled (8) 3/16" holes, 4 per side for mounting it to the roof. I'm going to use a stainless steel machine bolt.


Sorry for the crooked picture, I had to lean over the spare tire. All folded up this measures in at 10"x22".
This is a good view of the side slots that will house the red rope lights.


Tomorrow I will center this as well as I can and drill the holes in the roof. The pull it down, drill and mount the LED interior lights, rope lights, paint it black and reinstall it.

Sunday, August 19, 2012

Reinstalling the bellypan skids

These poly skids needed to be removed because when the roll cage was installed the bolts came through the bottom and prevented these from being mounted [flush] again.


I had to cut the bolts down so they wouldn't hang through. I got some more paint under there too.

Drilled out the skids on the drill press with a 1 1/2".

Remounted flush again.

Overhead Console- Fabrication

This is the center console I'm fabbing up. 16ga. sheet metal. 22" x 10". It's going to mount on the inside of the roof between the driver and passenger, like a typical center console. It's main purpose is to house the 4 interior lights that will be flush mounted into it. In addition, I will be putting rope mood lights on the side, better seen in the picture at the bottom.


I had to score and dot tons of lines with accuracy or else the whole thing would be crooked. The "X's" represent the cutouts. Better seen in the pictures below.
This is the top, the unvisiable side. It will be mounted toward the roof.
The grooves in which the rope lights will fit into.


Uber thanks to Keith Bailey at the Offroad Connection in Fultondale, Alabama. Not only for the use of his machines (shears, brakes, etc.) but also for helping me design and finish this. As always, he does it with a smile on his face.

Rear Tire Insert- Logo Design

This is the spare tire insert/cutting board. It is a 3 piece project. The top layer (1/8" steel) will have a logo waterjetted into it. There are 4 pieces of threaded tubing (3/8") welded to the back of it. Then there is a piece of 16ga. sheet metal, sandwhich in the middle, and finally a piece of 1/2" polycarbonate cutting board on the bottom.

The whole idea here is to sport a logo on the 1/8" plate, as previously mentioned, but when I pull the grill out,I will have a cutting/serving board for the food.

This shows the distance between the piece. The treads will not be exposed, nor will there be standard nuts there. The treaded tubing will conceal the bolts and keep a clean look. (Not pictured)

This is backside of the piece. The polycarbonate cutting board with countersunk 3/8" tapered bolts. The hoop in the middle is to tie this back to the cage so it doesn't rattle of fall out.


Better picture of it here.

I've decided on a logo. It's the Gears of War logo. I will make it about 120* larger than pictured. Waterjetted out and I'll paint it red behind it to give it some depth. There are two mood lights that shine directly on this. It will look very good when following behind.


The top two mood lights are what shines on the tire insert.


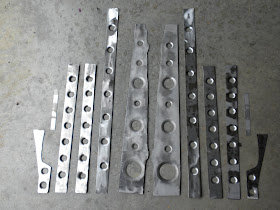
Roll Cage- Tie-ins

I'll be welding these in place this week.

Drill them out first so that you can slide the dimple dye in place.


On the smaller dyes you can just use a rubber hammer instead on a press.


12 pieces in all.